
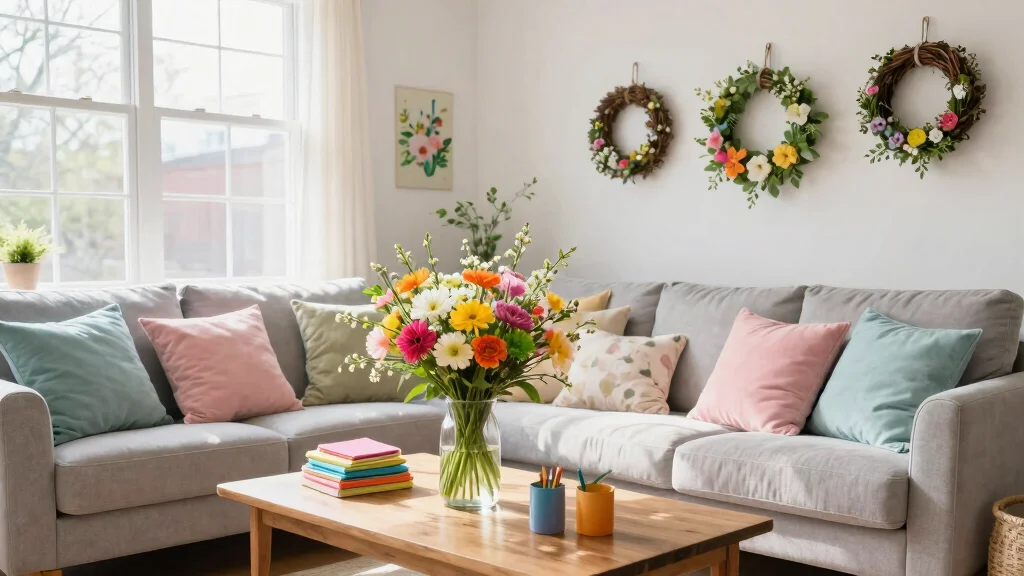
Spring is that magical time of year when everything feels fresh and alive. It’s a season that invites you to shake off winter’s gloom and breathe new life into your home. If you’re like me, you’re probably craving a way to celebrate the beauty of blooming flowers, warm sunshine, and vibrant colors. That’s why I created this post. I want to share some easy, fun, and budget-friendly DIY decor projects that can help you make your space feel like a springtime oasis.
If you love crafting, or simply enjoy adding a personal touch to your home, this guide is perfect for you. Whether you’re a seasoned DIY enthusiast or a beginner just starting to explore your creative side, these projects will inspire you to get your hands busy. Each project listed here is not only simple to execute but also brings that delightful spring vibe into your living space. With just a few materials, you can transform your home into a colorful sanctuary that reflects the beauty of the season.
In this blog post, you’ll discover 20 DIY spring decor projects that are so simple, you’ll want to start today! From floral wreaths to painted pots, I pulled together a variety of ideas that are charming, affordable, and guaranteed to bring a smile to your face. Get ready to roll up your sleeves and let your creativity blossom!
Key Takeaways
– Variety of Projects: You’ll find 20 different DIY decor projects that cater to various skill levels, ensuring there’s something for everyone.
– Budget-Friendly Ideas: Each project is designed to be easy on your wallet, so you can spruce up your space without breaking the bank.
– Easy Instructions: The blog post provides step-by-step guidance that makes each DIY project approachable and fun.
– Seasonal Inspiration: Embrace the beauty of spring with decor that enhances your home and reflects the vibrant energy of the season.
– Creative Expression: These projects allow you to express your creativity while making your home a welcoming and cheerful place.
Contents
- 1. Blooming Flower Wreath
- 2. Painted Terracotta Pots
- 3. DIY Spring Table Runner
- 4. Colorful Mason Jar Vases
- 5. Spring-Themed Wall Art
- 6. Fabric Flower Garland
- 7. Upcycled Eggshell Candle Holders
- 8. DIY Hanging Planter
- 9. Floral Print Pillows
- 10. DIY Butterfly Mobile
- 11. Spring-Themed Photo Frames
- 12. Natural Eggshell Planters
- 13. Twine-Wrapped Vases
- 14. DIY Spring Scent Sachets
- 15. Whimsical Garden Sign
- 16. Painted Wooden Crates
- 17. Spring Themed Coasters
- 18. DIY Spring Bookmarks
- 19. Upcycled Wine Bottle Vases
- 20. DIY Spring Garden Terrarium
1. Blooming Flower Wreath

Embrace the beauty of spring by creating a blooming flower wreath that welcomes guests with its vibrant charm. This stunning decor piece works wonders by combining the freshness of seasonal blooms with a touch of personalized style. Whether you opt for faux flowers or fragrant real ones, this wreath can be customized to reflect your favorite colors and materials. Adding elements like lush greenery or playful ribbons can further enhance its appeal and create a warm, inviting entrance to your home!
To achieve this look, consider sourcing flowers from local markets or using faux options for a budget-friendly choice. You can also involve your family in the crafting process, making it a fun and creative project. This simple wreath not only decorates your door but also uplifts your mood with its vibrant presence.
Consider these steps to create your wreath:
– Choose a wire wreath frame and gather your selected flowers
– Attach the flowers securely using floral wire
– Incorporate greenery for added depth
– Personalize with ribbons or initials for a unique touch
– Hang it proudly on your front door!
This wreath captures the essence of spring while allowing you to express your creativity and style through thoughtful arrangements and textures.
Image credit: MechaMakers on Pinterest
2. Painted Terracotta Pots

Transform your indoor or outdoor plants with colorful painted terracotta pots, bringing a lively touch to your spring decor. This project is a delightful and straightforward way to express your personality while enhancing the beauty of your plants. With a vibrant palette that reflects the freshness of spring, you can easily create patterns or designs using painter’s tape for clean lines. Let your imagination run wild, and brighten up your space!
For a budget-friendly option, consider buying terracotta pots in bulk or repurposing existing ones. Use leftover paint from other projects to create unique designs, and have fun experimenting with different colors. This project not only beautifies your plants but also adds a personal touch to your home.
Follow these steps to get started:
– Clean your terracotta pots thoroughly before painting
– Apply painter’s tape for desired designs
– Paint with vibrant colors and patterns
– Allow to dry completely before sealing with a clear coat
– Fill with your favorite plants and display them proudly!
These painted pots add a cheerful vibe to your space, making them perfect for gifts or as eye-catching centerpieces.
Image credit: leni on Pinterest
3. DIY Spring Table Runner

Refresh your dining area with a charming DIY spring table runner that ties together your seasonal decor effortlessly. This handmade addition can showcase your creativity and elevate your gatherings, making every meal feel special. You can choose a variety of materials such as fabric, burlap, or even colorful paper to suit your style. Add stenciled designs or floral motifs for a personalized touch that truly captures the essence of spring!
For an affordable option, check your local fabric store for remnants or use old tablecloths. This project is not just about aesthetics; it also brings warmth and a sense of celebration to your dining experience. Gather friends or family to help with the crafting for a memorable bonding activity.
Here’s how to create your spring table runner:
– Measure your table and cut the fabric to fit
– Decorate using stencils or freehand designs
– Sew edges to prevent fraying if using fabric
– Allow any paint to dry completely
– Lay the runner on your table and style with dishes and decor!
This simple yet impactful project brings spring’s spirit into your home, making every meal feel fresh and inviting.
4. Colorful Mason Jar Vases

Transform ordinary mason jars into delightful vases that bring a pop of color to your spring decor. This project is not only easy to create but also allows you to showcase your favorite blooms in style. By painting jars in cheerful hues or wrapping them with twine, you can enhance their rustic charm and brighten up any space. Use them as centerpieces or decorative accents around your home!
To keep costs low, consider using empty jars you already have or sourcing them from thrift stores. Let your creativity shine by experimenting with different colors and designs. These vases are perfect for both fresh flowers and faux arrangements, making them versatile for any occasion.
Here’s how to craft your colorful mason jar vases:
– Clean and dry your mason jars thoroughly
– Paint the jars in your chosen colors, allowing them to dry between coats
– Optionally, wrap the tops with twine or ribbon for extra flair
– Fill with fresh or faux flowers
– Display them on tables, shelves, or as charming centerpieces!
This crafting project allows for endless customization and adds a joyful touch to your home, showcasing the beauty of spring blooms.
Image credit: Recipes Lifestyle on Pinterest
5. Spring-Themed Wall Art

Bring the essence of spring into your home with your own unique wall art! Using a canvas or wooden board, you can paint or decoupage with floral patterns, charming quotes, or vibrant colors that uplift any space. This project offers a wonderful opportunity to express your creativity and brighten up your walls with personalized decor that resonates with the season!
For a budget-friendly approach, consider using reclaimed wood or canvas scraps, and shop for paints at discount stores. This project is not only enjoyable but also allows you to celebrate your artistic side while enhancing your home’s ambiance. Gather friends or family to create a fun art night together!
Follow these steps to create your spring-themed wall art:
– Choose the size of your canvas or wooden board
– Plan your design using stencils or freehand
– Paint your design, allowing layers to dry in between
– For decoupage, apply glue layers for a smooth finish
– Hang your art where it will bring joy!
Creating personalized wall art adds warmth to your home and beautifully showcases your creativity while celebrating the beauty of spring.
Fun fact: A 30-minute DIY spring wall art project using thrifted scraps can transform a room for under $10. Paint, decoupage, or floral patterns on canvas or reclaimed wood give your space a fresh, seasonal focal point. Start small, save money, and let your creativity bloom.
6. Fabric Flower Garland

Add a whimsical flair to your decor with a delightful fabric flower garland! This project is not only simple but also a wonderful way to use leftover fabric scraps, making it budget-friendly and eco-conscious. Drape this cheerful garland across mantels, doorways, or walls for an enchanting spring accent that brightens your space!
To keep costs low, use fabric remnants you already have or check local fabric stores for discounts. This project is a fantastic way to involve family or friends, turning crafting into a fun group activity. The playful design will surely bring smiles to all who see it!
Here’s how to create your fabric flower garland:
– Cut your fabric into petal shapes
– Sew or glue the petals together to form flowers
– Attach the flowers to string or twine, spacing them as desired
– Hang your garland in your favorite spot!
This cheerful garland adds a playful vibe to your home, enhancing your spring decor and creating a joyful atmosphere.
Image credit: Shawnda Ewing on Pinterest
Difficulty Rating & Requirements
Overall Difficulty Rating: Easy
These DIY spring decor projects are rated as easy. Most of them require minimal tools and materials, making them perfect for beginners. Whether you’re an experienced crafter or a novice looking to brighten your home for spring, you’ll find something enjoyable and satisfying in this list.
Time Estimate:
⏱ Estimated time: 1 to 3 hours per project
Depending on the complexity of the project, you can expect to spend anywhere from 1 to 3 hours. For instance, a simple painted terracotta pot may take around an hour, while creating a fabric flower garland could take up to three hours if you include drying time.
Skill Requirements:
– Required skills: Basic crafting skills, painting, gluing, and sewing (for some projects)
– Beginner-friendly: Yes
This collection is beginner-friendly, as most projects require basic skills that can easily be learned. Tasks like painting or gluing are straightforward, while sewing projects can be tackled with just a little practice.
Tools & Materials Needed:
🧰 Essential items checklist:
– Paint (required)
– Paintbrushes (required)
– Hot glue gun (required)
– Scissors (required)
– Fabric or twine (optional, for certain projects)
– Mason jars (optional, for vase-related projects)
– Terracotta pots (required)
– Decorative elements like flowers or ribbons (optional)
While some items are optional, having the required tools will ensure you can complete all the projects without interruption.
Step-by-Step Overview:
1. Gather Materials: Set aside 15-30 minutes to collect all the tools and materials needed for your chosen projects. This step is crucial for a smooth crafting experience.
2. Prepare Your Workspace: Spend about 10-15 minutes creating a clean, organized workspace. Lay down newspapers or a craft mat to protect your surfaces from paint or glue spills.
3. Create Your Decor: Allocate 1-3 hours to work on your project. Follow the instructions carefully, allowing drying time when necessary. Divide larger projects into smaller tasks if needed.
4. Finishing Touches: Take around 15-30 minutes to finalize your decor. Add any additional decorative elements and ensure everything is securely attached. Let it dry completely before displaying it in your home.
5. Display Your Work: Once your decor is dry, take a moment to enjoy your efforts. Decorate your space with your fun creations, bringing a fresh spring vibe to your home.
Cost Comparison: Professional vs DIY:
Hiring a professional to create custom spring decor could cost you between $150 and $500, depending on the project size and intricacy. In contrast, tackling these DIY projects can cost as little as $20 to $50, depending on the materials you choose. If you enjoy crafting and want a personal touch in your home, these DIY projects are a perfect choice. However, if you’re short on time or prefer a polished look without the effort, hiring a pro is worth considering.
By assessing these aspects, you can confidently decide if taking on these DIY spring decor projects is right for you. Happy crafting!
7. Upcycled Eggshell Candle Holders

Celebrate the spirit of Easter by transforming eggshells into charming candle holders! This project is a fun and creative way to recycle after your egg decorating activities. These delicate holders create a soft, ambient glow that’s perfect for cozy spring evenings, adding a magical touch to your decor.
For a budget-friendly approach, you can use eggs from your kitchen. This project is not only enjoyable but also a great way to teach children about recycling and creativity. Gather your loved ones and make it a fun crafting session!
To create your eggshell candle holders, follow these steps:
– Carefully empty the eggshells and clean them thoroughly
– Melt wax in a double boiler, adding food coloring if desired
– Place a wick in each eggshell, then pour the melted wax
– Allow to cool, then trim the wick
– Display on a decorative plate or stand!
These unique candle holders add a lovely, festive touch to your spring table setting or gatherings, creating a warm and inviting atmosphere.
Image credit: Fanny Jannet Arenas Mesa on Pinterest
8. DIY Hanging Planter

Bring a touch of greenery into your home with a simple DIY hanging planter! This project is perfect for showcasing your favorite plants while saving space and adding a trendy vibe to your decor. You can use macramé, fabrics, or repurposed materials to create beautiful hanging planters that elevate your interior!
Consider sourcing inexpensive plant pots and twine or rope from craft stores or even repurposing old materials you have at home. This project not only enhances your decor but also invites nature indoors, creating a calming atmosphere. Invite friends over for a crafting session to make it a social event!
Here’s how to create your DIY hanging planter:
– Cut lengths of twine or rope to your desired size
– Create a macramé or knotted design to hold the pots
– Secure the pots in the knots or hang them directly
– Choose a strong hook for hanging and find the perfect spot!
This project not only enhances your decor but also allows you to enjoy the benefits of nature indoors, providing a refreshing atmosphere.
9. Floral Print Pillows

Transform your living room or bedroom with cheerful floral print pillows that capture the spirit of spring! This project is a fun way to refresh your space without the need for a full makeover. You can sew your own pillow covers or use fabric paint to create unique designs that reflect your style.
For a budget-friendly option, consider using fabric remnants or even old pillowcases. This project not only enhances your decor but also allows you to add personal touches that bring comfort and joy to your home. Gather family or friends for a crafting session to make it even more enjoyable!
Follow these steps to create your floral print pillows:
– Measure your pillow inserts and cut the fabric to size
– Sew or paint your desired floral designs on the fabric
– Assemble the pillow covers and insert the pillows
– Fluff them up on your sofa or bed!
These pillows will add a vibrant pop of color and comfort to your space, making them perfect for cozy spring days.
Image credit: Avis Kunze on Pinterest
10. DIY Butterfly Mobile

Celebrate the beauty of spring with a lovely DIY butterfly mobile that adds whimsy to any space! This enchanting decor piece is perfect for children’s rooms, nurseries, or any area that could use a touch of magic. By creating colorful butterflies from paper, felt, or fabric, you can hang them from a branch or hoop, bringing a playful element to your home.
For a budget-friendly approach, use materials you already have at home or shop for inexpensive supplies at craft stores. This project is not only fun but also a great way to encourage creativity and imagination, making it an enjoyable activity for the whole family!
Here’s how to craft your butterfly mobile:
– Cut butterfly shapes from the chosen material
– Decorate them with markers or paint if desired
– Attach strings to each butterfly and hang from your branch or hoop
– Hang the mobile in your chosen spot!
This project adds a playful touch to your decor, beautifully celebrating the joyful essence of spring.
Image credit: 💖Mahshid 💖 on Pinterest
11. Spring-Themed Photo Frames

Showcase your favorite spring memories in style with DIY photo frames that reflect the season’s beauty! You can easily transform plain frames using paint, decorative paper, or even natural elements like twigs and flowers. This project is not just about displaying photos; it’s a creative way to add personalized decor to your walls or shelves!
For a budget-friendly option, use old frames or gather natural materials from your garden. This project allows you to celebrate your cherished moments while enhancing your home with beautiful, customized decor. Invite friends over to create a fun framing party!
To create your spring-themed photo frames, follow these steps:
– Choose your frame and clean it if necessary
– Paint or cover with decorative paper
– Attach twigs or flowers using glue for a natural touch
– Insert your favorite spring photos and display proudly!
Creating personalized photo frames adds a homey touch to your decor, beautifully showcasing your treasured memories while celebrating the season.
Image credit: Erin on Pinterest
12. Natural Eggshell Planters

Embrace sustainability by crafting charming planters from eggshells! These adorable planters not only serve as a creative way to plant seeds but also provide a biodegradable option for gardening. This project is perfect for kids, encouraging a love for nature and gardening while being eco-friendly.
For a budget-friendly approach, simply use eggs from your kitchen. This project not only fosters creativity but also teaches valuable lessons about recycling and nurturing life. Gather your family for a fun gardening activity that everyone can enjoy!
Here’s how to create your natural eggshell planters:
– Carefully empty eggshells and clean them out
– Fill each shell with soil
– Plant seeds according to the package instructions
– Water gently and place in a sunny spot
– Once sprouted, plant the whole shell in your garden!
These natural planters add a unique touch to your windowsill or garden, introducing an eco-friendly approach to spring gardening and nurturing a love for nature.
Image credit: Szilvia László-Bezdán on Pinterest
13. Twine-Wrapped Vases

Add rustic charm to your decor with twine-wrapped vases that beautifully showcase your blooms! This simple project allows you to recycle glass bottles, transforming them into stunning decor pieces. The textured twine adds warmth and character, making these vases perfect for any spring arrangement.
For a budget-friendly option, use empty bottles you already have at home. This project not only enhances your decor but also promotes sustainability by reusing materials. Invite friends over for a fun evening of crafting and sharing ideas!
To create your twine-wrapped vases, follow these steps:
– Clean and dry your glass bottles thoroughly
– Start wrapping twine around the bottle, securing it with glue if desired
– Continue wrapping until the bottle is covered to your liking
– Fill with flowers or use as decorative pieces!
These twine-wrapped vases are stylish and budget-friendly, adding a touch of rustic elegance to your spring decor.
Image credit: Ольга Барщевская on Pinterest
14. DIY Spring Scent Sachets

Infuse your home with the fresh scents of spring using delightful DIY sachets! These easy-to-make sachets can be filled with dried flowers, herbs, and essential oils that bring the essence of the season indoors. They are perfect for placing in drawers, closets, or simply displaying around your home to enhance the atmosphere!
For a budget-friendly approach, gather dried flowers from your garden or use herbs from your kitchen. This project not only smells wonderful but also serves as a lovely decorative touch throughout your home. Involve your family in the crafting process for a fun bonding experience!
Here’s how to create your spring scent sachets:
– Cut fabric into small squares
– Fill each square with your chosen dried flowers or herbs
– Add a few drops of essential oil for extra fragrance if desired
– Sew or tie shut
– Place around your home for delightful spring scents!
These sachets not only smell amazing but also add a beautiful touch to your decor, creating a refreshing atmosphere throughout your home.
Image credit: Bekah Szecsy on Pinterest
15. Whimsical Garden Sign

Add a playful touch to your garden with a whimsical DIY garden sign! This fun project allows you to personalize your outdoor space with charming messages or labels for your plants. Using reclaimed wood or sturdy cardboard, you can create a quick and easy craft that enhances your garden’s character and style.
For a budget-friendly option, gather materials from your home or local recycling center. This project offers a wonderful opportunity to express your creativity while showcasing your unique personality in your garden. Invite friends or family to join in the crafting fun!
To create your whimsical garden sign, follow these steps:
– Cut your wood or cardboard to your desired shape
– Paint your message or design using vibrant colors
– Allow to dry and seal if needed for durability
– Place in your garden or outdoor area!
This project adds charm to your garden while celebrating your creativity and personality with playful designs.
Image credit: Jassmine Schmidt on Pinterest
16. Painted Wooden Crates

Transform wooden crates into stylish decor pieces with a splash of paint! These versatile crates can serve multiple purposes, acting as storage, side tables, or even planters, making them a functional addition to your home. Choose colors that complement your spring theme for a cohesive and refreshing look.
For a budget-friendly option, consider sourcing crates from local markets or thrift stores. This project not only enhances functionality but also adds a pop of color to your space, making it feel more vibrant and inviting. Gather friends for a fun crafting afternoon to bring your vision to life!
To create your painted wooden crates, follow these steps:
– Sand the crates if needed
– Choose your paint colors and apply them evenly
– Allow drying time, then add a sealant for durability if desired
– Use as storage or decorate with plants and flowers!
This project beautifully merges functionality and aesthetics, adding a cheerful touch to your spring decor.
Image credit: Jill’Ene Parkinson on Pinterest
17. Spring Themed Coasters

Protect your surfaces while adding a touch of spring flair with DIY coasters! Using materials like cork, wood, or tiles, you can create coasters that reflect the beauty of the season. Paint or decoupage them with floral images or bright colors to infuse your space with spring vibes.
For an affordable option, gather materials you already have or shop for inexpensive supplies at craft stores. This project not only serves a practical purpose but also allows you to express your creativity and brighten up your home. Get together with friends for a crafting session to make this activity even more enjoyable!
Here’s how to create your spring-themed coasters:
– Select your coaster material
– Paint or apply decoupage designs
– Allow to dry and seal if necessary
– Enjoy them on your tables!
These coasters not only serve a purpose but also add a splash of creativity and seasonal charm to your decor.
Want DIY decor that’s cute and practical? Spring themed coasters are your go-to: grab cork, wood, or tiles, paint or decoupage floral designs, and protect surfaces—all while refreshing your space with affordable DIY decor.
Image credit: vanessa on Pinterest
18. DIY Spring Bookmarks

Celebrate your love for reading while adding a touch of spring with DIY bookmarks! This simple craft is perfect for personalizing your reading experience and makes for thoughtful gifts. You can decorate bookmarks with floral designs, inspiring quotes, or even photo collages using cardstock, fabric, or watercolor paper.
For a budget-friendly option, use leftover paper or fabric scraps you have at home. This project not only encourages creativity but also enhances your reading journey, making it enjoyable and personalized. Invite friends over for a fun crafting day to make these delightful bookmarks together!
Follow these steps to create your spring bookmarks:
– Cut your paper into bookmark size (about 2×6 inches)
– Decorate with designs or quotes
– Punch a hole at the top and add a ribbon if desired
– Use them while reading or gift to friends!
These bookmarks add a personal touch to your reading experience, inspiring creativity while celebrating the joy of spring.
“Spring into reading with DIY bookmarks that bloom on every page. Use floral designs, quotes, or scrap fabric to personalize gifts on a budget, turning every chapter into a tiny garden of inspiration. Pro tip: reuse leftover paper and fabric scraps for quick, creative bookmarks.”
Image credit: Artisan Alley | DIY, Crafts | Colorful Home Decor | Party Ideas on Pinterest
19. Upcycled Wine Bottle Vases

Transform empty wine bottles into striking vases that add elegance to your spring decor! This upcycling project is not only eco-friendly but also a fun way to create beautiful decor pieces. Whether you paint them or leave them clear, these vases are sure to become statement pieces in your home.
For a budget-friendly approach, use bottles you have already enjoyed or check local thrift stores for inexpensive options. This project encourages creativity and sustainability while enhancing your home with unique decor. Gather friends for a crafting session to enjoy this fun and environmentally friendly activity!
To create your upcycled wine bottle vases, follow these steps:
– Clean the wine bottles thoroughly
– Paint or wrap with twine to decorate as desired
– Allow to dry completely
– Fill with fresh flowers or use them as standalone decor!
This project not only beautifies your space but also promotes eco-friendly practices, making it a meaningful addition to your spring decor.
Image credit: Brian Evans on Pinterest
20. DIY Spring Garden Terrarium

Bring a touch of spring indoors with a DIY garden terrarium! This mini ecosystem is customizable and can be filled with small plants, pebbles, and other natural elements that create a lively decor piece. It’s a fun project that adds a unique touch to any room while allowing you to enjoy the beauty of nature indoors.
For a budget-friendly option, use a glass container you already have or purchase an inexpensive one. This project is perfect for all ages, encouraging creativity and a love for plants. Gather family or friends to make a fun day of creating your terrariums together!
To create your DIY spring garden terrarium, follow these steps:
– Start with a clean glass container
– Create a drainage layer with pebbles at the bottom
– Add potting soil for your plants
– Arrange the plants and decorative elements as desired
– Water lightly and place in a light-filled area!
This terrarium serves as a lively decor piece that is low maintenance, providing a beautiful reminder of spring and nature in your home.
Image credit: Sarah S. on Pinterest
Conclusion

Spring is a time of renewal and creativity, and these DIY decor projects are perfect for embracing this vibrant season. From floral wreaths to charming terrariums, each project offers a personal touch that will brighten your home. So gather your materials and get started on these fun, budget-friendly crafts today. Your home will thank you for it!
Note: We aim to provide accurate product links, but some may occasionally expire or become unavailable. If this happens, please search directly on Amazon for the product or a suitable alternative.
This post contains Amazon affiliate links, meaning we may earn a small commission if you purchase through our links, at no extra cost to you.
Frequently Asked Questions
What are some easy, budget-friendly DIY decor projects I can start this spring today?
Spring is the perfect time to refresh your space with DIY decor projects that are easy and budget-friendly. Try simple ideas like painted terracotta pots, a mason jar centerpiece, or a lightweight wall hanging made from craft paper. To get started: 1) choose 1–2 projects that fit your space, 2) gather affordable supplies (paint, brushes, scissors, glue, tape), 3) set aside a weekend to finish them, 4) style and tweak colors as you go. This approach keeps your crafts manageable and totally doable today.
How can I create budget-friendly spring crafts that brighten a room without breaking the bank?
Want spring crafts that brighten rooms without blowing your budget? Focus on upcycling: glass jars become votives, scrap fabric becomes a bunting, or a thrifted frame becomes a fresh art piece. Combine these with fresh greenery from a garden or grocery store. Steps: 1) scout thrift stores or around-the-house items, 2) collect inexpensive supplies (mod podge, paint, twine, vase fillers), 3) pick 1 focal project and 1 supporting piece, 4) finish with a clear sealant. Your DIY decor will look cohesive and budget-friendly every time.
What basic tools should I have for DIY spring decor projects?
Every beginner needs a small toolbox for spring crafts and DIY decor. Start with the basics: scissors, a hot glue gun with extra sticks, a craft knife, ruler, pencil, double-sided tape, paint and brushes, a drop cloth, and a small foam roller. With these, you can tackle most projects like simple wall art, planters, and garlands. Pro tip: keep a dedicated workspace to stay organized and avoid mess during weekend projects.
How can I tailor DIY spring decor for small spaces or rental homes?
How can you adapt DIY spring decor for small spaces or rentals? Choose removable options: 1) wall art made with removable decals or canvas, 2) lightweight planters on shelves or windowsills, 3) decorative items that can be moved or stored easily, 4) use a flexible color palette to keep the space feeling fresh. Use Command strips and removable tape rather than nails. This keeps things budget-friendly and non-permanent while still delivering a spring vibe.
Any tips for turning found items into cohesive spring crafts?
Want to turn found items into cohesive spring crafts? Start by gathering a small batch of items with a common color story: driftwood, glass bottles, bottle caps, twine. Clean and prep, then apply a unifying finish—paint, stain, or whitewash. Add a natural accent like eucalyptus, pine, or fresh cuttings. Group pieces together on a tray or shelf to create a unified display. Keep your crafts and DIY decor cohesive by sticking to 1–2 color tones and a simple style.
*As an Amazon Associate, I earn from qualifying purchases.
Related Topics
DIY decor
spring decor
budget-friendly
easy crafts
home improvement
seasonal decorations
beginner friendly
quick projects
outdoor decor
colorful accents
minimalist design
family activities
Related posts:
 15 Spring DIY Projects That Are So Easy, You’ll Wonder Why You Didn’t Do Them Sooner!
 21 DIY Home Decor Projects That Will Instantly Uplift Your Space (And Your Mood!)
 15 Patio Refresh Ideas That’ll Make You Want to Live Outside This Spring (Check Out #8!)
 21 Stunning Christmas Table Decor Ideas That Will Impress Your Guests!
Leave a Reply