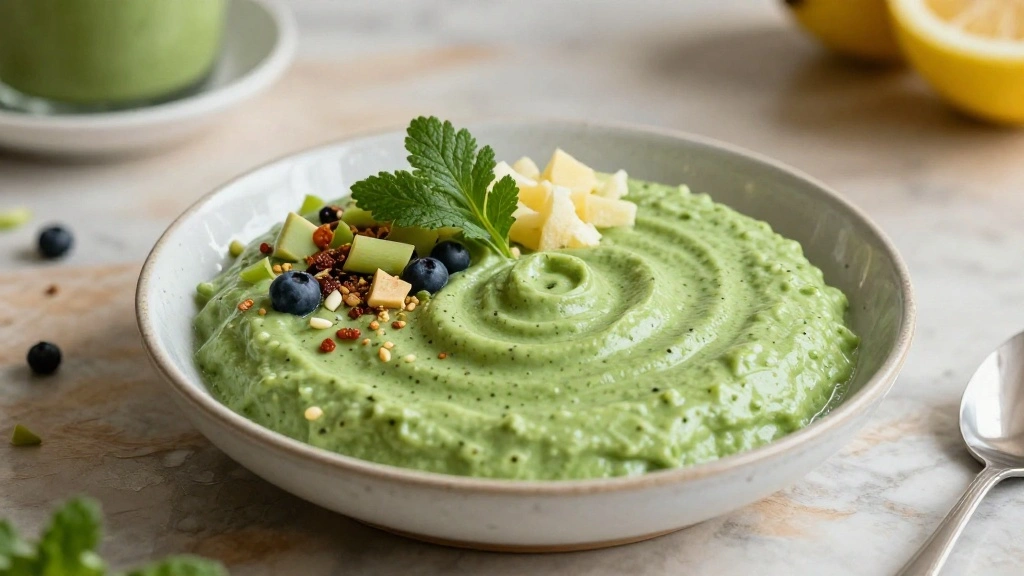
There’s something incredibly refreshing about starting your day with a vibrant green smoothie.
The burst of fresh flavors combined with a nutritional powerhouse makes these beverages both delicious and beneficial.
I first encountered the magic of green smoothies during a wellness retreat, where they were a staple for detoxification.
Whether it’s a post-holiday cleanse or a daily health ritual, these green smoothies are perfect for rejuvenating your body.
The recipes I’m sharing today focus on simplicity and wholesome ingredients, ensuring anyone can whip up these detoxifying delights.
Prepare to embark on a green journey that not only delights your taste buds but also revitalizes your system.
The History and Cultural Significance
• Detox Your Body traces its origins to the health-conscious movements of the 1960s, where it was originally created by nutritionists advocating for natural detoxification methods.
• The dish evolved over decades as smoothies became more popular with the addition of superfoods and leafy greens, eventually becoming the beloved version we know today.
• In Western culture, these smoothies often appear at health and wellness retreats, symbolizing a commitment to cleansing and rejuvenation.
• While many variations exist across different regions, the authentic version maintains a balance of greens and fruits that sets it apart from imitations.
Recipe Overview
Nutritional Information (per serving)
Essential Equipment Guide
Blender: A high-speed blender is crucial for achieving a smooth, creamy texture without any chunks. Alternatives like a food processor might work, but they may not achieve the same consistency. Look for a blender with at least 1000 watts of power for optimal results.
Measuring Cups and Spoons: Accurate measurements ensure the perfect balance of flavors and nutrients. While eyeballing might work for experienced cooks, beginners should rely on these tools for consistency. Choose stainless steel for durability and precision.
Knife and Cutting Board: Sharp knives make chopping fruits and vegetables safer and more efficient. Opt for a chef’s knife and a non-slip cutting board to enhance safety and ease.
Ingredients
For the Base
|
|
| Amount | Ingredient | Notes |
|---|---|---|
| 1 cup | spinach | fresh, washed, and packed for nutrient density |
| 1 cup | kale | fresh, de-stemmed, and packed for detoxifying power |
Fruits
| Amount | Ingredient | Notes |
|---|---|---|
| 1 medium | banana | peeled, provides natural sweetness and creaminess |
| 1 cup | pineapple | fresh or frozen chunks, adds tropical sweetness |
Liquids
| Amount | Ingredient | Notes |
|---|---|---|
| 1 cup | coconut water | provides hydration and subtle flavor |
Add-ins
| Amount | Ingredient | Notes |
|---|---|---|
| 1 tablespoon | chia seeds | boosts omega-3 and fiber content |
Preparation Methods
Layering Ingredients: Start with liquids at the bottom of the blender to help create a vortex that pulls down fruits and greens. This technique ensures a smooth blend and prevents air pockets.
Blending in Stages: Begin with a pulse to break down larger pieces, then gradually increase the speed to high. This prevents overheating and ensures all ingredients are fully incorporated.
Consistency Check: Pause to scrape down the sides and test the smoothie’s thickness. Adjust with additional liquid or ice as needed to achieve your desired texture.
Step 1: Prepare Ingredients

Gather all the fresh ingredients and equipment on your counter.
Wash and dry the spinach and kale thoroughly.
Peel the banana and cut it into chunks.
Measure out a cup of pineapple, and ensure it's fresh or properly thawed if frozen.
Step 2: Add Liquids First

Pour one cup of coconut water into the blender.
This creates a liquid base to help with blending.
Ensure the coconut water is at room temperature to blend smoothly.
Place the blender lid securely on top.
Step 3: Add Greens

Add the spinach and kale to the blender on top of the coconut water.
Pack the greens tightly to fit them all in without overflowing.
Ensure the greens are evenly distributed in the blender.
Press down gently with a tamper if necessary.
Step 4: Add Fruits

Place the banana chunks into the blender next.
Follow with the pineapple chunks for a sweet and tangy flavor.
Ensure the fruits are evenly dispersed among the greens.
This layering helps with even blending.
Step 5: Incorporate Add-ins

Add a tablespoon of chia seeds on top of the fruits.
These will add texture and nutritional value.
Make sure to evenly distribute the seeds across the top.
This helps them blend uniformly.
Step 6: Initial Blending

Start blending on a low setting to chop the larger pieces.
Gradually increase the speed to medium to combine ingredients.
Pause to scrape down the sides with a spatula.
Ensure all pieces are moving freely within the blender.
Step 7: Final Blending

Increase the blender speed to high for a final blend.
Blend for about 30-45 seconds until smooth and creamy.
Check the consistency and adjust with more liquid if necessary.
Ensure no large chunks remain for a silky texture.
Step 8: Serve and Enjoy

Pour the finished smoothie into a glass.
Use a spatula to scrape out every last drop.
Garnish with a sprinkle of chia seeds on top if desired.
Serve immediately for the freshest taste and nutritional benefits.
Critical Timing and Temperature Guide
Blending Time: Blend for 30-45 seconds on high speed until smooth. Look for a creamy texture with no visible chunks. Avoid over-blending to prevent heating the smoothie.
Ingredient Temperature: Use room temperature coconut water and chilled fruits for the best consistency. Cold ingredients can make blending difficult and may require additional liquid.
Serving Time: Serve the smoothie immediately after blending. Delaying can result in nutrient loss and separation of the liquid from the solids.
Pro Tips for Detox Your Body
• Ingredient Selection: Opt for organic spinach and kale to avoid pesticides, which can counteract detox efforts.
• Preparation Secret: Slightly massage the kale leaves to break down fibers and enhance blending.
• Temperature Management: Ensure all ingredients are at a compatible temperature; room temperature liquids blend better with cold fruits.
• Texture Enhancement: Use frozen fruits for a thicker, creamier consistency without the need for ice.
• Flavor Layering: Blend greens first with liquids to ensure they are well-incorporated before adding fruits.
• Make-Ahead Strategies: Prepare the ingredients ahead of time and store them in individual freezer bags for each smoothie serving.
• Restaurant-Quality Finishing Touches: Add a slice of lime on the glass rim for a professional touch.
• Equipment Optimization: Ensure the blender blades are sharp and the unit is properly assembled to prevent leaks and inefficiencies.
Troubleshooting Common Issues
• Smoothie Too Thick: This usually happens if too little liquid is used. Add more coconut water gradually and blend again until the desired consistency is achieved.
• Separation of Ingredients: Caused by over-blending or sitting too long. Stir briskly or give it a quick blend before serving.
• Bitter Taste: This can occur if the greens are too mature. Use younger leaves or balance with more sweet fruits like banana or mango.
• Chunky Texture: Often due to insufficient blending or poor layering. Ensure to blend on high and layer ingredients carefully next time.
• Lack of Flavor Depth: If the smoothie tastes bland, consider adding a pinch of sea salt or a dash of citrus juice to enhance flavors.
• Overpowering Greens: If greens dominate the flavor, balance with additional fruit or a splash of honey for sweetness.
Variations and Regional Differences
• Tropical Twist: Substitute mango for pineapple and add a splash of lime juice for a Caribbean-inspired version.
• Asian Influence: Use matcha powder instead of spinach for an earthy flavor and a caffeine boost.
• European Green: Incorporate parsley and cucumber for a refreshing, herbaceous taste popular in Mediterranean diets.
• North American Classic: Add almond milk in place of coconut water and include a tablespoon of almond butter for a creamier texture.
Food Science Behind the Recipe
• Emulsification: The blending process emulsifies fats from the seeds and liquids, creating a smooth and stable mixture.
• Nutrient Preservation: Blending at high speeds helps break down cell walls of greens, making nutrients more bioavailable.
• pH Balance: The addition of fruits helps balance the pH of the greens, making the smoothie more palatable and easier on the stomach.
Frequently Asked Questions
What's the most common mistake people make when preparing green smoothies? Overloading the blender with too many ingredients, which can lead to an unbalanced flavor and difficult blending.
How can I make my smoothie less bitter? Add naturally sweet fruits like bananas or a small amount of honey to counteract the bitterness of greens.
Can I make these smoothies in advance? Yes, but it's best to consume them within 24 hours to maximize nutrient retention and flavor.
What if I don't have all the ingredients? Substitute similar items like using romaine lettuce if kale isn't available or apple juice for coconut water.
Can I use frozen greens? Yes, frozen greens are convenient and retain most of their nutrients, but blending might take slightly longer.
Why did my smoothie separate? Separation is natural over time. Simply stir the smoothie or give it a quick blend to recombine.
How can I store leftover smoothie? Store in an airtight container in the refrigerator and consume within 24 hours for best taste and nutrition.
Serving and Presentation Guide
• Traditional Presentation: Serve in a tall glass with a wide straw for easy sipping.
• Garnish Options: Add a sprinkle of chia seeds or a slice of lime on the rim for added appeal.
• Layered Presentation: For a visual twist, make a thicker smoothie and layer it with yogurt or fruit puree.
• On-The-Go: Pour into a mason jar with a lid for a portable option that retains freshness.
Conclusion
These green smoothies are a delightful way to boost your health while enjoying delicious flavors.
With endless possibilities for customization, they can suit any palate or dietary need.
Embrace the art of blending and transform your wellness routine with these vibrant drinks.
*As an Amazon Associate, I earn from qualifying purchases.
Related posts:
 20 Healthy Smoothie Recipes That Are Blending Perfection (Don’t Miss #7!)
 15 Quick Healthy Dinner Recipes That Will Change Your Weeknight Game Forever!
 10 Digital Detox Practices That’ll Clear Your Mind and Boost Your Happiness!
 6 Gourmet Christmas Recipes That Will Make You Feel Like a Chef (Your Guests Will Love #3!)
Leave a Reply