
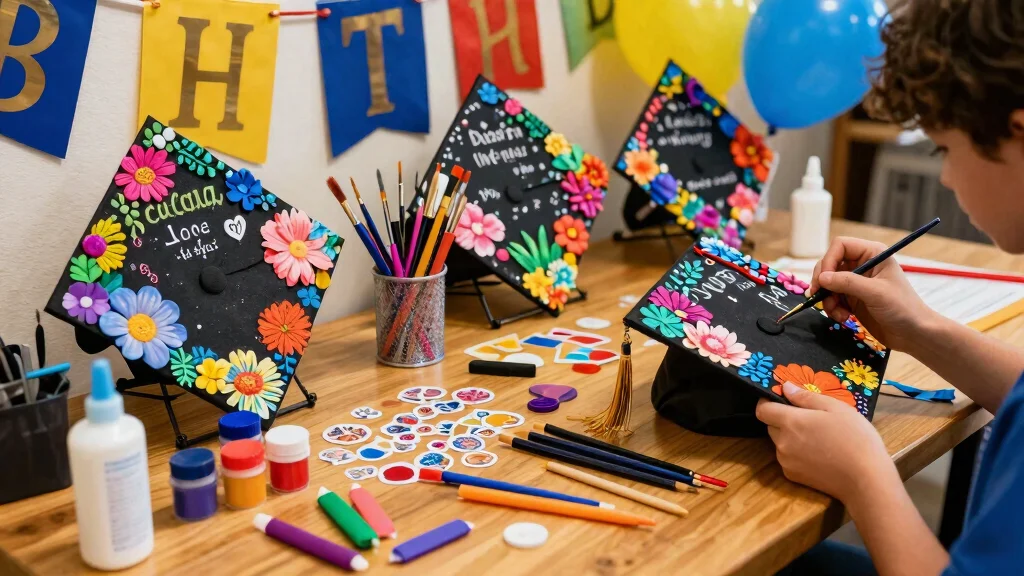
Graduation season is always a whirlwind of emotions. From the pride of your accomplishments to the bittersweet farewell to friends and mentors, it’s a time that deserves to be celebrated in style. Therefore, what better way to express your personality and achievements than through your graduation cap? Whether you’re a high school senior or a college graduate, decorating your cap is a chance to make a statement and stand out in a sea of black mortarboards.
Why Decorating Your Graduation Cap Matters
If you’re someone who loves DIY projects and wants to create a unique graduation cap that reflects your individuality, this post is for you. In addition, you’ll find a treasure trove of creative graduation cap decoration ideas right here. Each idea is designed to inspire you and help you express your unique journey. Whether you prefer floral designs that bring a touch of nature or quotes that motivate and uplift, there’s something for everyone.
Get Ready to Shine on Your Big Day
Get ready to dive into 15 fantastic DIY ideas that are not only fun to create but also perfect for showcasing your personality on your big day. For instance, you’ll learn how to transform an ordinary cap into a stunning masterpiece that you’ll remember for years to come. So, let’s get crafty and celebrate your graduation in a way that truly shines!
Decorating your cap is just the beginning of your creative journey. If you love personalizing your space as much as your graduation gear, don’t miss our 20 DIY Spring Decor Projects to keep the crafting spirit alive all season long.
Key Takeaways
– Decorating your graduation cap is a fun way to express your personality and celebrate your achievements.
– This guide features 15 creative DIY ideas, ranging from floral themes to inspirational quotes.
– You will find tips and tricks for each design to help you create a standout cap.
– Materials and techniques are simple enough for anyone to try, regardless of crafting experience.
– Your decorated cap will be a memorable keepsake from your graduation day that reflects your unique journey.
Contents
- 1. Floral Fantasy
- 2. Sparkle and Shine
- 3. Inspirational Quotes
- 4. Themed Designs
- 5. Photographic Memory
- 6. Nature-Inspired
- 7. Color Block
- 8. Beading and Texture
- 9. Retro Vibes
- 10. Artistic Elegance
- 11. Minimalist Charm
- 12. Cultural Heritage
- 13. 3D Elements
- 14. Upcycled Designs
- 15. Cosmic Dreams
1. Floral Fantasy

Want to make your graduation cap bloom with creativity? Floral accents can transform your cap into a stunning piece of art. By using faux flowers, you can easily craft a gorgeous floral crown or a striking centerpiece that truly stands out.
Choose flowers in colors that reflect your personality or match your school colors. Bright daisies, classic roses, or cheerful sunflowers can add a joyful touch. These flowers not only enhance your cap’s beauty but also symbolize growth and new beginnings, making them perfect for this special occasion.
To create your floral masterpiece, gather these materials:
– Faux flowers in assorted sizes and colors
– Hot glue gun and glue sticks
– Craft scissors
– Floral wire for support (optional)
Follow these steps:
1. Cut and arrange the flowers to find your perfect layout.
2. Secure the flowers onto the cap with your hot glue gun.
3. Allow it to dry completely before wearing.
This cap will surely catch everyone’s eye as you walk across the stage!
Image credit: متجر كيان اكسسوارات نسائيه هدايا رجاليه on Pinterest
Floral Fantasy
Editor’s Choice

Graduation Cap Headband, Firm Anti-fall HairBand for Graduation Hat, Hat…
 Amazon$5.99
Hot Glue Gun, 20V Pink Cordless Glue Gun with 30 PCS Full Size Glue Stic…
Amazon$59.99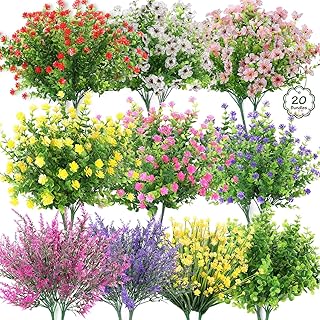
20 Bundles Realistic Artificial Flowers for Outdoors, UV Resistant No Fa…
Amazon$19.992. Sparkle and Shine

Want to add some dazzling flair to your graduation cap? Sparkles from glitter and rhinestones can help you shine bright on your big day. This design focuses on catching the light and turning heads in the crowd.
You can cover the entire cap in glitter or create a unique pattern with rhinestones to spell out your degree or initials. This dazzling look perfectly celebrates your hard work and achievements.
Here’s what you’ll need:
– Fine glitter in your favorite colors
– Mod Podge or craft glue
– Rhinestones or gems
– Paintbrush for applying glue
Instructions to get started:
1. Apply a thin layer of Mod Podge to the areas you want to cover with glitter.
2. Generously sprinkle glitter over the glue.
3. Shake off any excess glitter and let it dry.
4. Use glue to attach rhinestones in your desired patterns.
This cap will make you shine as bright as your future!
Image credit: •andrea• on Pinterest
Sparkle and Shine
Editor’s Choice

3000 PCS Gem Stickers – Self Adhesive Scrapbook Supplies | Rhinestones f…
Amazon$5.97
Graduation Cap Headband, Firm Anti-fall HairBand for Graduation Hat, Hat…
Amazon$5.993. Inspirational Quotes

Looking to express your motivation on graduation day? Your cap can feature your favorite quotes, turning it into a personal reminder of your journey and aspirations.
Select a quote that resonates with your experiences. You can paint it, use vinyl letters, or even write it in beautiful calligraphy. This design is all about simplicity and a personal touch.
Gather these materials:
– Acrylic paint or vinyl letters
– Paintbrush or weeding tool for vinyl
– Clear sealant spray to protect your design
Steps to create your quote cap:
1. Decide on the quote and how you want to lay it out.
2. If painting, lightly sketch it with a pencil first.
3. Carefully paint or apply the letters for a clean look.
4. Seal your design with clear spray for durability.
This cap will not only inspire you but also uplift those around you!
Image credit: Feyza Şakar on Pinterest
Inspirational Quotes
Editor’s Choice

Shuttle Art Fabric Paint, 18 Colors Permanent Soft Fabric Paint in Bottl…
Amazon$19.99
810 Piece 10 Sheet Letter Stickers – Self Adhesive Vinyl Waterproof Mail…
Amazon$5.99
Mod Podge Spray Acrylic Sealer that is Specifically Formulated to Seal C…
Amazon$10.184. Themed Designs

Thinking about a cap that tells your story? Consider a theme that reflects your major or passion. Whether you’re into science, literature, or art, a themed cap showcases your individuality.
If you’re graduating in environmental science, decorate your cap with images of the Earth or nature quotes. These themed designs can spark conversations and highlight your unique journey.
Materials to gather:
– Theme-related stickers or cutouts
– Paint or markers for sketches
– Glue or Mod Podge for sticking elements
Here’s how to create your themed cap:
1. Collect images and items that relate to your theme.
2. Arrange them on your cap to find an appealing layout.
3. Secure everything with glue.
4. Add finishing touches with paint or markers.
This cap will resonate with your journey and ambitions!
Image credit: Stinky ⁾⁾ on Pinterest
Themed Designs
Editor’s Choice

102PCS Forest Stickers,Adventure Aesthetic Outdoor Stickers for Boys Gir…
Amazon$7.99
ARTISTRO 2 Black Acrylic Paint Markers – 0.7mm Extra Fine-Tip Paint Pens…
Amazon$6.99
Shuttle Art Acrylic Paint, 36 Colors Acrylic Paint Set with Brushes & Pa…
Amazon$24.995. Photographic Memory

Want to celebrate your school memories? Personalizing your cap with a collage of your favorite photos can encapsulate your unique journey. Using printed photos, you can beautifully tell the story of your academic life.
This idea allows you to reminisce about unforgettable moments while celebrating your achievement.
Here’s what you need:
– Small printed photos
– Mod Podge or glue
– Scissors for trimming
– Clear sealant to protect your design
Instructions to follow:
1. Select and print your favorite photos.
2. Trim them to fit your desired layout on the cap.
3. Adhere the photos securely using Mod Podge.
4. Seal your design for added durability.
This cap will uniquely reflect your journey and friendships!
Turn your graduation cap into a tiny memory book—resize, print, and paste your best moments. This practical collage keeps your school journey visible long after the photos fade.
Image credit: Laetyn Miller on Pinterest
Photographic Memory
Editor’s Choice

Nylon Universal Cable Tie Buckle, Heavy Duty Self-Locking Nylon Zip Ties…
Amazon$6.99
50PCS Boho Aesthetic Pictures Wall Collage Kit, Peach Teal Photo Collect…
Amazon$6.99
B-7000 Craft Glue for Jewelry Making – 15ml/0.5oz (2 Pack) – Multi-Funct…
Amazon$4.976. Nature-Inspired

Want to bring a bit of the outdoors to your graduation cap? A nature-inspired design can include leaves, branches, and earthy tones, showing your love for the environment.
Using natural elements creates a serene and beautiful aesthetic, making your cap stand out while being eco-friendly!
Materials you’ll need:
– Dried leaves or flowers
– Mod Podge
– Craft scissors
– Earth-tone paints
Steps to craft it:
1. Arrange the dried leaves or flowers on the cap.
2. Secure them in place with Mod Podge.
3. Optionally, paint around the natural elements for added effect.
4. Allow it to dry completely before wearing.
This cap will radiate tranquility and beauty!
Image credit: newgenwisdom44 on Pinterest
How To Choose the Right Graduation Cap Decoration Ideas
When it comes to making your graduation cap stand out, choosing the right decoration is essential. You want something that reflects your personality, achievements, and creativity. Here are some tips to help you select the perfect design for your graduation cap decoration.
1. Personal Significance
Think about what represents you. Your cap should reflect your journey, interests, or aspirations. Consider adding elements like your major, hobbies, or even a favorite quote that motivates you. This personal touch will make your cap uniquely yours and memorable during the ceremony.
2. Size and Shape
Ensure that your decorations fit well within the dimensions of your cap. Most graduation caps are square and about 9 inches by 9 inches. Be careful to avoid overcrowding the space. You want your design to be visible without overwhelming the cap. Consider making a mock-up on paper first to plan your layout.
3. Materials
Choose materials that are both lightweight and durable. Common options include cardstock, fabric, glitter, and paint. Remember, heavier materials might make the cap uncomfortable to wear. If using beads or embellishments, make sure they are securely attached so they don’t fall off during your ceremony.
4. Theme or Style
Decide on a theme that resonates with you. Whether it’s floral, cosmic, or minimalist, having a clear theme will guide your decoration choices. Look for inspiration on platforms like Pinterest or Instagram to find styles that you love. This can help in visualizing your final product and ensuring all elements work well together.
5. Time and Effort
Assess how much time you want to invest in your cap decoration. Some designs require more intricate work, while others might be simpler and quicker. If you’re short on time, opt for easier designs such as stickers or pre-made patches. Planning ahead and starting early can save you stress as graduation approaches.
6. Budget
Keep an eye on your budget. Decorations can range from inexpensive to costly, depending on materials and tools needed. You can find many DIY options that use everyday materials, which can save you money. Make a list of what you need and stick to it to avoid overspending.
Pro Tip: Always take a step back and look at your design from a distance. This will help you see how it will appear during the ceremony and whether it needs any adjustments. Don’t hesitate to ask friends or family for their opinions! Their feedback can provide insights you might have missed.
Nature-Inspired
Editor’s Choice

FolkArt Terra Cotta Acrylic Paint Set of 5, Essentials 2 fl oz Assorted …
Amazon$17.81
Matte Sealer, Glue & Finish: All-in-One Craft Solution- Quick Dry, Easy …
Amazon$3.99
20 Pcs Preserved Dried Eucalyptus Stems, 17″ Natural Fresh Eucalyptus Br…
Amazon$14.397. Color Block

Are you a fan of bold colors? A color-block design can be a trendy choice for your graduation cap. Create geometric shapes or stripes to make a vibrant statement that’s sure to stand out!
Personalize it by incorporating your school colors or hues that represent your personality.
What you’ll need:
– Acrylic paint in various colors
– Painter’s tape for clean lines
– Paintbrushes
– Clear sealant to protect your design
Steps to create your look:
1. Use painter’s tape to section off areas of your cap.
2. Paint each section with different colors.
3. Carefully remove the tape once dry.
4. Seal it with clear spray for lasting protection.
This cap will showcase your creative flair and personality!
Image credit: AmenaMa on Pinterest
You might also like


Color Block
Editor’s Choice

Apple Barrel, Vibrant Spectrum Collection Acrylic Craft Paint, PROMOABII…
Amazon$15.97
Custom Shop 1/4″ Fine Line Tape Fineline Masking Tape Polytape Orange 1/…
Amazon$14.99
Mod Podge Spray Acrylic Sealer that is Specifically Formulated to Seal C…
Amazon$10.188. Beading and Texture

Want to elevate your graduation cap design? Adding beads and texture can create a dynamic look that stands out. This tactile design allows for unique patterns and a fun 3D effect!
Mixing materials like fabric or lace can also make your cap truly one-of-a-kind.
Gather these materials:
– Beads in various sizes and colors
– Fabric or lace
– Hot glue gun
– Craft scissors
To craft your textured cap:
1. Plan your design layout first.
2. Secure beads and fabric onto the cap with hot glue.
3. Allow it to dry completely before wearing.
This cap will add a fun and dynamic element to your graduation look!
Image credit: camille c on Pinterest
Beading and Texture
Editor’s Choice

Xmada Jewelry Making Supplies Kit – 1587 PCS Beads, Crystal Beads, Jewel…
Amazon$23.73
Hot Glue Gun, 20V Pink Cordless Glue Gun with 30 PCS Full Size Glue Stic…
Amazon$59.99
5pc 26” lap scarf silk feeling fabric lap scarves with lace trims lap h…
Amazon$14.999. Retro Vibes

Looking to embrace nostalgia? A retro-themed graduation cap can reflect your favorite decade, featuring vintage colors and pop culture references. Whether you love the groovy ’70s or vibrant ’90s, your cap can showcase that personality!
Incorporate funky patterns, old-school stickers, or hand-drawn doodles to highlight your favorite influences.
Items needed:
– Retro stickers or printouts
– Colorful markers or paint
– Glue for securing elements
Instructions to create your retro cap:
1. Gather your favorite retro elements.
2. Arrange them on the cap before securing.
3. Use glue to attach everything firmly.
4. Experiment with colors to capture the vibe of the era.
This cap will be a fun throwback that celebrates your unique style!
Image credit: VAN 🪐🛰️ on Pinterest
Retro Vibes
Editor’s Choice

Gorilla Max Strength Construction Adhesive, Clear Glue, 2.5 Ounce Squeez…
Amazon$7.84
50 PCS 80s 90s Stickers for Kindle Adults Vintage 80s 90s Stickers for W…
Amazon$3.59
Betem 24 Colors Dual Tip Acrylic Paint Pens Markers, Premium Water-Based…
Amazon$7.9910. Artistic Elegance

Are you an art lover? Turn your graduation cap into a canvas! Create a mini painting or abstract design that showcases your artistic skills. Use acrylic paints to express yourself freely and let your creativity shine.
This cap is personal, with each stroke telling a part of your story.
Materials required:
– Acrylic paints in various colors
– Paintbrushes of different sizes
– Palette for mixing colors
– Clear sealant for protection
Steps to create your masterpiece:
1. Plan your design on paper before painting.
2. Start with a base layer and build up colors.
3. Allow each layer to dry before adding details.
4. Seal it all to keep your art intact.
Wear this cap with pride as it showcases your uniqueness!
Image credit: Mya on Pinterest
Artistic Elegance
Editor’s Choice

Artkey Acrylic Paint Set, 24 Colors 2 oz/59 ml Acrylic Paint Kit for Pro…
Amazon$14.44
Mod Podge Spray Acrylic Sealer that is Specifically Formulated to Seal C…
Amazon$10.18
Nicpro Detail Paint Brushes 5 PCS Aesthetic Extra Fine Tip 000 Professio…
Amazon$7.4911. Minimalist Charm

Sometimes, less is more. A minimalist graduation cap can be incredibly chic and stylish. Using a muted color palette with simple designs or symbols creates elegance that stands out in its simplicity.
Think about using a few lines or a small emblem that represents your journey or future aspirations.
Materials you may need:
– Neutral-colored paint or fabric
– Fine-tip markers for detailing
– Simple embellishments like ribbon or paper cutouts
Steps to create this look:
1. Choose a base color for your cap.
2. Create a small design or symbol with markers.
3. Add subtle embellishments to enhance the look.
4. Keep it clean and simple to ensure it shines.
This cap will radiate understated elegance!
Sometimes less truly is more. A single line or tiny emblem can express your journey louder than a loud splash of color. With minimalist graduation cap decoration, you’ll stand out with elegance and meaning—quiet, confident, unforgettable.
Image credit: Pauline Jewel on Pinterest
Minimalist Charm
Editor’s Choice

MEEDEE Rainbow Ribbon Solid Color Assortment 10 Colors Double Face Satin…
Amazon$7.99
Shuttle Art Fabric Paint, 18 Colors Permanent Soft Fabric Paint in Bottl…
Amazon$19.99
Sharpie Permanent Markers Variety Pack, Includes Chisel, Fine, and Ultra…
Amazon$5.7412. Cultural Heritage

Want to celebrate your cultural background? Your graduation cap can showcase symbols, patterns, or colors that represent your heritage, allowing you to honor your roots.
Consider using fabric, prints, or painted designs that hold significance to your culture.
Items needed:
– Cultural fabric or prints
– Paint for detailing
– Glue or Mod Podge for securing elements
Steps to create your cultural cap:
1. Choose elements that represent your heritage.
2. Arrange them on your cap for the best appearance.
3. Secure with glue and let it dry.
This cap will be a powerful representation of your identity!
Image credit: 💋 on Pinterest
You Might Also Like


Cultural Heritage
Editor’s Choice
Mod Podge Matte Sealer, Glue & Finish: All-in-One Craft Solution- Quick …
Amazon$3.99
Colorful Fabric Paint Set for Clothes 12 Colors – Permanent Textile Pain…
Amazon$11.98
60 Pcs 4″ x 4″(10cm x 10cm) Assorted Craft Fabric Bundle Squares Patchwo…
Amazon$5.9913. 3D Elements

Ready to take your cap design to the next level? Adding 3D elements can create a whimsical touch that draws attention. Items like feathers, fabric flowers, or small figurines can elevate your look!
Just ensure that 3D elements are securely attached so they don’t fall off during the ceremony.
Materials you’ll need:
– 3D embellishments like feathers or fabric elements
– Strong adhesive or hot glue
– Craft scissors for adjustments
Steps to follow:
1. Plan placements for your 3D elements.
2. Use strong adhesive to secure them firmly.
3. Allow to dry completely before wearing.
This cap will be a standout piece, drawing all eyes!
Image credit: Izkra ‘heras on Pinterest
3D Elements
Editor’s Choice

Mr. Pen Craft Scissors – Decorative Edge, 6 Pack, Zig Zag, Scrapbooking,…
Amazon$6.85
Hot Glue Gun, 20V Pink Cordless Glue Gun with 30 PCS Full Size Glue Stic…
Amazon$59.99
Kokoma Elegant Peony Flower Brooch Pin for Women Lady Fabric Flower Pear…
Amazon$8.9914. Upcycled Designs

Want to get creative while being eco-friendly? Using upcycled materials for your graduation cap adds a unique touch and helps the planet. Think about incorporating fabric scraps, old jewelry, or other crafty items you have around.
This project can also be a fun way to repurpose meaningful items.
Materials needed:
– Upcycled materials like fabric pieces or trinkets
– Glue for securing elements
– Scissors for cutting materials
How to craft:
1. Gather your upcycled items.
2. Arrange them on your cap for the best design.
3. Secure them with glue and let it dry.
This cap will tell a story of achievement and sustainability!
Upcycled designs prove that smart, eco-friendly graduation cap decoration can be truly personal. Save scraps, swap trinkets, and turn memories into art—one bold piece at a time. Your cap becomes a story you proudly wear.
Image credit: Alexandra T. on Pinterest
Upcycled Designs
Editor’s Choice

50 PCS 8″ x 8″ Precut Multi-Colors Cotton Fabric Squares Fabric Bundles …
Amazon$12.39
Bearly Art Precision Craft Glue – The Original – 4fl oz – Tip Kit Includ…
Amazon$16.99
Utopia Care Eyebrow Scissors, Professional Stainless Steel Small Shears …
Amazon$5.9915. Cosmic Dreams

Ready to embrace the universe? A cosmic-themed graduation cap can showcase stars, planets, and galaxies, creating a dreamy and whimsical look. Perfect for astronomy lovers or anyone captivated by the beauty of space!
Using dark colors with bright accents can create a striking contrast that makes your cap pop.
Materials you’ll need:
– Dark acrylic paint for the base
– Bright colors for stars and planets
– Sponges or brushes for effects
– Glitter for starry accents
How to create your cosmic cap:
1. Paint the base color and let it dry.
2. Use sponges or brushes to create stars and planets.
3. Add glitter for a magical touch.
This cap will inspire wonder and curiosity!
Image credit: ari🪩 on Pinterest
Cosmic Dreams
Editor’s Choice
Apple Barrel, Vibrant Spectrum Collection Acrylic Craft Paint, PROMOABII…
Amazon$15.97
24 Pcs Foam Paint Brushes, Wood Handle Sponge Brushes for Painting, Stai…
Amazon$6.99
LEOBRO Glitter, 32 Colors Fine Glitter for Crafts, Resin, Body Hair Face…
Amazon$9.44Conclusion

Graduation is a time to celebrate your accomplishments, and your cap can be a personal expression of your journey. Each of these DIY decoration ideas allows you to showcase your personality and creativity, making your graduation day even more memorable.
So gather your supplies, unleash your creativity, and let your cap tell your unique story. You might even inspire others with your stunning design!
Note: We aim to provide accurate product links, but some may occasionally expire or become unavailable. If this happens, please search directly on Amazon for the product or a suitable alternative.
This post contains Amazon affiliate links, meaning we may earn a small commission if you purchase through our links, at no extra cost to you.
Now that your cap is ready to shine, it’s time to think about the celebration! Whether you’re treating yourself or a fellow graduate, explore our 15 Unforgettable Anniversary Gift Ideas for more inspiration on meaningful keepsakes.
Frequently Asked Questions
What are some quick and effective DIY graduation cap decoration ideas to stand out?
Here are a few quick, creative DIY ideas to help your graduation cap decoration stand out. You can mix and match with the 15 ideas in the article for extra impact. Try these:
– Bold quote cap: Apply bold, removable vinyl letters to spell a short message. Materials: removable vinyl letters, transfer tape, clear sealant. Steps: layout letters, apply with transfer tape, press firmly, seal with a light spray to prevent peeling.
– Major pride cap: Paint your cap in school colors and add your major initials with a stencil or vinyl. Steps: base coat, stencil/paint, dry, seal.
– Galaxy gradient cap: Create a quick gradient with two to three craft paints using a sponge; finish with white specks for stars and seal.
– Photo memory cap: Attach a tiny photo using corner mounts or a clear resin cabochon.
– Metallic accents cap: Use metallic tape or foil shapes in a geometric pattern for a chic look. Finish with sealant.
Tip: keep decorations lightweight, test adhesion, and protect the cap surface to prevent flaking during photos.
What materials and tools do I need for a durable graduation cap decoration DIY?
To create a durable graduation cap decoration DIY, gather these essentials:
• A clean, undamaged cap and a flat working surface
• Lightweight decorations (paper shapes, vinyl decals, ribbons)
• Adhesives: hot glue gun with sticks, glue dots, double-sided tape, and tacky glue
• Sealing options: clear spray sealant or Mod Podge (matte or satin)
• Decorating tools: scissors, craft knife, ruler, pencil, tweezers
• Colors and details: acrylic paints, paint markers, or permanent markers, vinyl letters or stencils
• Optional safety pins or small adhesive backings for extra security on heavier pieces
Pro tip: test your full design on scrap paper first and do a quick wear test before the ceremony.
How can I personalize my graduation cap decoration to reflect my major, hobbies, or future plans?
Personalizing your graduation cap decoration is a breeze with a DIY plan. Start by choosing a theme that matches your major, hobbies, or future plans, then build around a coordinated color palette and some creative ideas. Try these ideas: use symbols or icons (e.g., beaker for science, book for education, guitar for music), add initials or a short motto, and include your graduation year. Sketch the layout first, then apply elements from largest to smallest. Finish with a protective sealant to keep everything in place for photos and cheers.
Are there graduation cap decoration ideas that are quick and easy to do right before the ceremony?
Absolutely! Here are quick, DIY ideas you can tackle in under 30 minutes to still look amazing:
– Bold initial cap: big school or major initials in vinyl letters with a simple color background.
– Galaxy or metallic edge cap: quick gradient or metallic tape along the edge for a polished look.
– Word cloud cap: a few short keywords arranged to form a tiny cloud or banner.
– Photo accent cap: a single tiny photo with corner mounts.
Tips: keep items lightweight, plan placement first, and seal the surface after placing to prevent shifting during photos.
How can I ensure my DIY graduation cap decoration lasts through the ceremony?
To make sure your graduation cap decoration lasts, prioritize secure attachment and protection:
• Keep heavier pieces lightweight and distribute weight evenly.
• Use a combination of adhesives (glue dots + double-sided tape) and a light sealant to guard against wear and moisture.
• Do a quick wear test at home to check fit and durability, and adjust as needed.
• If you expect a lot of movement or weather exposure, consider extra security like subtle safety pins for small pieces.
• Store an extra small adhesive kit for quick fixes between photos.
*As an Amazon Associate, I earn from qualifying purchases.
Related Topics
graduation cap decoration
DIY projects
creative ideas
personalized designs
easy tutorials
themed decorations
beginner friendly
colorful designs
trendy styles
minimalist design
quick crafts
graduation 2023
Related posts:
 14 Creative St. Patrick’s Day Drinks That’ll Turn Your Party Up a Notch (Wait Until You Try #7!)
 10 Best Seasonal Decor Items for DIY Lovers – Get Festive!
 20 DIY Spring Decor Projects That Are So Simple, You’ll Want to Start Today!
 15 Spring DIY Projects That Are So Easy, You’ll Wonder Why You Didn’t Do Them Sooner!
Leave a Reply